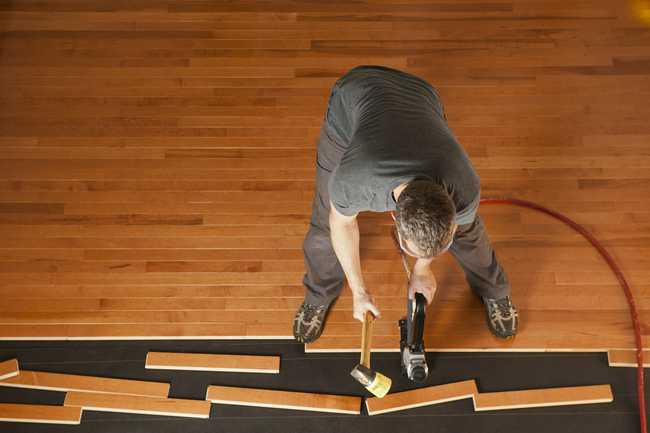
5 Essential Tips for Tongue and Groove Flooring
- Published By: District Floor Depot

Nothing beats the class and style of hardwood floors!
This flooring has been a mainstay since the frontier days, but while the pioneers simply nailed rough planks directly to the joists, there are now several ways to install beautiful hardwood floors.
One of the easiest ways to install hardwood flooring—even if you’re doing it yourself—is by utilizing the tongue and groove method. To learn more about tongue and groove flooring, read on!
What Is Tongue and Groove Flooring?
Just like skinning a cat, there’s more than one way to install a hardwood floor.
Many floors are nailed or stapled directly to the floor. This allows for a sturdy, long-lasting surface, but it’s challenging to do. Planks can also be glued directly to the subfloor. This is relatively simple, but if you ever want to replace your floor, it’s a pain to redo.
The fastest and easiest method is a floating floor. These are not directly attached to the subfloor. Instead, the planks are connected to one another and then placed on top of the subfloor. A pad is usually placed between the flooring and the subfloor. This may not be as durable as other methods, but it’s much more straightforward and often less expensive. It is also easy to replace.
Tongue and groove flooring is a type of floating floor. Each plank has a thin piece of material called the tongue on one end, and a slot on the other called the groove. The tongue slides inside of the groove and pops into place. This makes for easy and versatile installation.
That said, there still may be some struggles for the novice Do It Yourselfer installing their own floor. Here are some tips to make the install go more smoothly.
1. Not All Planks Are Created Equally
As the old adage goes, you get what you pay for.
Tongue and groove flooring may be less expensive than other hardwood options, but there’s still a huge variety in price. You may be able to find a flooring option for less than a dollar per square foot, but it will likely be less durable and need to be replaced sooner.
Additionally, you can either buy planks made of real hardwood or what’s called “engineered flooring,” which is molded to look like hardwood.
2. Clear the Area
Adding a new floor is a big project. It requires you to move everything from the room.
But moving furniture is a hassle, especially when you have to move it into other rooms to store throughout the project. You might be tempted to keep it in the same room, moving it around to avoid the work area. Take it from us: it will be much less work than if you move it one time rather than multiple.
In addition to moving the furniture, you’ll also want to remove any decor in the room—wall hangings, photographs, nick-nacks, etc. Not only do you run the risk of bumping them as you carry the flooring, but there will be a fair amount of dust kicked up by this project. Pack them up and keep them clean.
3. Don’t Skip Out On the Underlayment
As a floating floor, tongue and groove flooring does not need to be attached to the subfloor. However, if you don’t add an underlayment between the subfloor and the panels, you can run into several problems.
Most notably, your floor will squeak and bend as you walk across it. When you move the floor, the wood of the floor will grind against the wood of the subfloor. An underlayment adds a cushioning to keep this from happening.
The underlayment can also protect against water damage. If you’re installing your tongue and groove flooring onto a concrete floor, an underlayment is necessary to prevent moisture from accumulating between the concrete and the flooring. These tips are pretty important if you’re installing your flooring in the basement, as basements are much more prone to leaks.
4. Remove the Baseboards
Even the most accomplished carpenter has a hard time cutting the floor planks totally flush to the wall. To hide this, they will use baseboards along the bottom of the wall.
When you’re adding new flooring, it’s important to note that you probably won’t be able to cut your planks thoroughly flush either. Luckily, you can use the same baseboards already in place. However, since the baseboards are placed snugly against the existing floor, you will need to remove the baseboards to fit the new flooring underneath them
You can fasten baseboards to the wall with a few nails. Simply pop them off and put them in a safe place until you’re ready to reinstall them. Be careful not to break them as you remove them, though.
5. Don’t Force It
The tongue and groove locking system are deceptively simple. You merely pop the tongue edge into the groove, and it sturdily locks into place.
However, inserting the tongue into the groove may seem a bit difficult at first. If you don’t place it at just the right angle, it won’t snap into place.
Resist the urge to force it into place. This can cause the tongue to break, rendering the plank useless.
Instead, adjust your angle and apply a controlled pressure. Once you figure out the right motion, the job will move like a snap!
Let’s Get Flooring!
Redoing your hardwood floors can seem like an impossible task. But thanks to the tongue and groove flooring method, you can finish your floor installation project more efficiently—and for less!
Visit our shop to find the right flooring for your needs!
