The Ultimate Guide to Hardwood Floor Repairs
- Published By: District Floor Depot
5/5
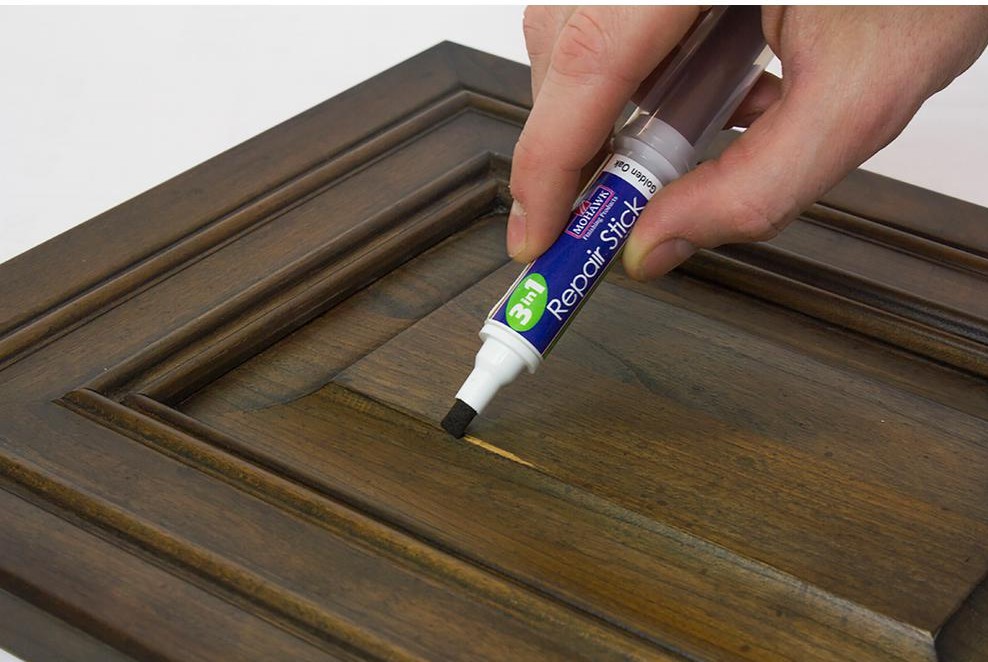
Table of Contents
–
Share on Facebook
Share on Pinterest
Share on Linkedin
Share on Twitter
Share via Email
The Step-by-Step Floor Repair Guide: Dents and Scratches
Are your hardwood floors dented and scratched from wear and tear?
Maybe you are concerned about a couple of newly-formed dents and scratches from your cat, Winston. That darn cat is too cute to rat out, but the scratches are undeniable.
Engineered hardwood or residential sturdy wood floors are habitually scratched in evidently obvious ways. Scrapes from furniture legs, noticeable pet claw inscriptions, and other scratches occur in your otherwise flawless wood.
We get it, not all dents and scratches are a huge concern, and sometimes they add a peculiar sense of richness.
Either way, how do you fix them?
The Guidelines for Fixing Scratches and Dents
There’s no one way to fix every dent on all variations of wood flooring. Instead, you should try to assess the type of scratch on your wood, whether they are deep or light, and then you can adopt the repair technique.
You should repair your floors in conjunction with the wood floor’s form. And this type of floor fixing doesn’t involve deep sanding.
But it will involve a picky toolkit of techniques that blend, fade, and color the dents to decrease the contrast against the remaining area of the flooring.
Evaluate the Flooring
The first step is evaluating your floors. If you have site-finished wood floors in your home, meaning your floors were finished on-site, then you can expect a stress-free fix. The protective layer on site-finished flooring is quite easy to sand.
However, if you are dealing with pre-finished hardwood floors, meaning your floors were finished before installed, you may run into some difficulties.
The multiple aluminum oxide and urethane layers on pre-finished hardwood floors form a hard skin that can defeat your blending and sanding efforts.
Clean the Affected Floor Region
Before starting any repairing any scratches on your wood surface, make sure you clean the affected area and the region around it thoroughly.
You can use a dustpan and soft-bristled broom to get rid of debris. Avoid using any solvents with pastes and waxes during the cleanup. The aim is to clean the area and not to seal the wood.
Cleaners that leave protective or shiny layers behind should not be used when cleaning the wood floor that needs to be fixed. Try using a DYI home cleaner instead.
The Step-by-Step Guide to Fixing Scratches and Dents
Whether you are dealing with light scratches or deep dents, we have got a solution for your floors! Below is a step-by-step guide for blending and removing the blemishes on your hardwood floors.
Fixing Light Hardwood Scratches
Fine dents in hardwood flooring are both shallow and thin. These are the categories of scratches that may occur because of sliding chairs or boxes across the wood floor.
Since they are not deep, the dents can be hand-sanded and supplemented with color-blending methods.
- Select a floor color marker that is similar to the color of your wood floor.
- You can probably test the color marker for accuracy in non-visible areas.
- On the affected area, lightly brush the floor colorant marker over a section of the scratched area. If it blends well, you can proceed to color the rest of the affected area.
- For a lighter-colored hardwood floor, try rubbing walnut meal or raw walnut into the scratched area. Depending on the color of your wood flooring, a mixture comprised of an equal ratio of olive oil and vinegar can be useful as well.
- If the need for sanding rises, start with a ball of fine steel wool. Rub it gently over the scratches, and then clean the area with a tack cloth.
- If the wood covering is still in good shape, you can also try applying wood stain over the affected area, and then quickly dab it clean. The stain should infiltrate the fresh hardwood only.
Fixing Deep Hardwood Scratches
Sliding heavy home furniture or appliances, and even enthusiastic dogs using their claws on your wood floors may cause deep scratches.
If you have sturdy wood flooring and the scratches are numerous, your best option is sanding the whole wood floor.
But there is another method that includes filling the scratched area, and blending and coloring the affected area.
- Start by testing the wood marker colorant in areas that are not visible. It will help you determine the best color that matches your wood floor.
- If the wood scratch is up to 1/16 inch deep, you may need to fill in the area with the color marker resin.
- Be cautious about the crack. Always stay within it when applying the color.
- The wet filler should be smoothed down.
- Allow the filler to dry for a minimum of two hours.
- The wood filler should be mixed up for cracks that are very deep or wide.
- The hardwood filler should carefully be pressed into any cracks in the wood.
- Sand down the filler when the wood filler has dried, and try to avoid sanding the area of the floor that is undamaged.
- Lastly, the floor filler should be tinted to match the wood flooring.
We hope your hardwood floors shine brightly after preforming these DYI repairs. If you are faced with deep dents and scratches that won’t go away, it might be a good idea to contact a flooring repair professional.
Contact a Professional
Head to your neighborhood hardwood floor discounter for a free quote on your hardwood floor repairs. District Floor Depot proudly services the Washington, DC and metropolitan areas.
Feel free to give them a call, or check out more hardwood floor tips and tricks on the District Floor Depot Blog today!