Selecting new flooring for your home can be an exciting and creative process, but what steps do you need to take from start to finish?
It’s best to make sure you install your flooring correctly, so it looks impressive in your home and you can enjoy it for many years to come. You want to consider numerous factors that can affect your flooring installation decision, like durability, moisture, temperature, cost and location.
With various flooring types to choose from, it’s essential to understand each material’s installation aspects. This helpful guide will give you tips on how to select and install different flooring materials.
Types of Flooring
First, you should familiarize yourself with the different types of flooring available for your home. Your local hardware or flooring stores will have aisles filled with a range of colors and flooring materials that can make your decision a little more challenging. Each material has unique benefits and price points.
Here are some of the primary flooring types you can choose:
You can base your flooring decision on different factors specific to your home. With all the choices available, you can find a style that matches your home’s design and layout.
Acclimation Period of Flooring Installation
With any flooring you purchase, the material needs time to acclimate to your home’s conditions. The acclimation process depends on the flooring’s material and its location in your property. Flooring materials react differently to temperatures and moisture levels, so it’s crucial to know the acclimation period before you jump into installing your new flooring.
The acclimation period relies more on conditions than time, especially when you’re installing genuine wood flooring. Before manufacturers chop and use wood for flooring, the wood from a tree naturally soaks up water. This fact doesn’t change when you’re ready to install your wood flooring. All wood is porous, even laminate material, making the moisture in your home a significant factor in installing new flooring.
Humidity and Temperature for Acclimation
Acclimation is crucial in installing hardwood floors. Before you install hardwood, the material should reach an appropriate moisture content level in your home. If you don’t acclimate your wood, the planks could drastically expand, contract or experience other moisture-related damage. It’s best to know how your hardwood flooring and humidity levels in your home can affect the installation process.
If you’re building a new home or renovating an existing one, the hardwood flooring installation process should be the final project you complete. The HVAC system should be running so the wood can rest at an ideal temperature of about 60 to 80 degrees Fahrenheit.
Checking the moisture content before installing the wood flooring helps ensure the ambient humidity won’t damage the boards. The moisture content levels in the home should read around 30 to 50% humidity.
How to Best Acclimate Wood

Follow some of the best tips on acclimating your flooring before installation.
- Allow flooring to acclimate for at least three days: This time estimate can vary slightly depending on the flooring material, but three days is a good rule of thumb. Let your flooring rest inside your home for this time to adapt to the conditions. This process is why a professional installer may drop off the flooring materials a few days before they begin the installation process. Solid wood with wider than four inch in width may need more days than others.
- On-site finishing wood may need more time: Since you’ll be completing the finishing process on-site, the wood may need more time to acclimate. If you’re unsure how long the acclimation period is, ask the manufacturer or ask a professional to take over the installation process.
- Organize planks into smaller piles: Opening the packaging and separating the wood pieces into smaller piles helps increase the amount of airflow each piece receives, improving the acclimation process. Stack boxes or bundles perpendicular from one row to another to allow better airflow.
- Treat exotic wood with care: Different types of installed flooring may need a longer acclimation period. Unique materials like bamboo are more delicate, and the manufacturer or a professional would know the appropriate acclimation time frame for exotic wood materials.
What Flooring Is Best in Different Rooms?
Some rooms and levels of your home are better for select floor materials. If you want hardwood floors throughout your living space, research which materials will function the best in each area.
Some hardwood floors are ideal for rooms in your home that are at or above ground level. Hardwood floors can quickly soak up and release moisture, so the closer it is to the ground, the more likely the wood will become distorted or destroyed from moisture damage.
Each room in your home has conditions that make specific flooring materials the best choice. Learn the right rooms for each flooring option.
Hardwood Flooring Rooms
Here are the rooms in your home that would benefit the most from hardwood floors.
- Living room: Hardwood floors stand up to high foot traffic and transform your space into a welcoming and sophisticated gathering room.
- Dining room: You can achieve a casual or fancy look with hardwood floors in your dining room. Hardwood can stand up to the occasional spill with a quick cleanup. Maintain the floor’s durability by adding soft pads to the bottom of chair and table legs to prevent scratches and loud noises.
- Home office: Get productive in your home office with hardwood floors. They will look beautiful, and you’ll appreciate the durability.
- Bedroom: Hardwood floors look stunning in bedrooms. As long as the bedroom is on the ground floor or higher, ask if installing hardwood floors is an option in your bedrooms.
Many rooms benefit from hardwood floors, but what areas should you avoid?
- Bathroom: Hardwood and water don’t mix well. You’ll need to deal with frequent repairs or replacements if you put hardwood in your bathroom. On the other hand, vinyl flooring and humidity go hand in hand because vinyl is waterproof and won’t expand or contract in humid, moist conditions.
- Laundry room: Wet clothes and the possibility of your washer leaking are reasons you shouldn’t install hardwood floors in the laundry room. Choose an option that can stand up to water, like tile or linoleum.
- Mudroom: Everyone is taking their shoes off and tracking all kinds of substances from the outside. Avoid installing hardwood floors in a mudroom where foot traffic is dirty and moisture-prone. If you would like to install hardwood in this area, having rugs and cleaning more often may help longevity of the hardwood.
- Basement: Any space below ground level is not ideal for solid hardwood flooring due to the risk of moisture damage. If you want the best flooring for basements, try installing engineered hardwood. This option is more durable and can stand up to moisture better than traditional hardwood flooring. Ask a professional if engineered hardwood flooring is the best solution for your home.
Laminate or Vinyl Flooring Rooms
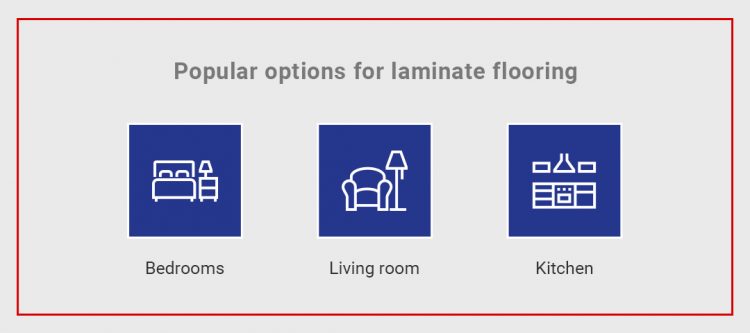
Laminate or vinyl are an excellent wood or tile lookalike flooring material that is also budget-friendly. Here are some popular options:
- Bedrooms: Replicate your favorite wood floor look with laminate or vinyl flooring in your bedroom.
- Living room: Laminate or vinyl flooring is durable enough to stand up to heavy foot traffic in living areas. It looks impressive for a fraction of the price you would pay for hardwood flooring.
- Kitchen: Spills are bound to happen in the kitchen, and laminate or vinyl floors are easy to clean up, making them the best flooring for kitchens.
Avoid installing laminate floors in these rooms.
- Laundry room: As with hardwood floors, too much water can damage laminate flooring. Laminate floors experience the same moisture issues as genuine wood because both are porous materials. Vinyl planks in the other hand are great waterproof alternatives.
- Bathrooms: Laminate is not the best flooring for bathrooms. Too much water can destroy the laminate planks. Vinyl can be ideal for the floors but may not be recommended for walls.
Tile Flooring Rooms
Tile floors are ideal for rooms that experience a lot of water and moisture, but they can also look incredible in unconventional rooms.
- Kitchen: Tile floors are durable against any spill in the kitchen. Tile is one of the best flooring options for kitchens.
- Bathroom: Out of all the flooring options for bathrooms, tile is common because it handles moisture and water so well.
- Laundry room: Tile in your laundry room will look striking and hold up to any overflowing washing machine or wet clothes.
- Bedroom: It’s not very common, but installing tile in your bedroom can give you a compelling look if you’re searching for a unique design. While it may be less cushy for your feet, it is durable and easy to clean. Soften the appearance with throw pillows, rugs and plush blankets.
Prepare Your Subfloor
Do squeaky floors drive you crazy? Typically, this issue has a simple fix. Most of the time, floors squeak because of a gap between the subfloor and the joists that support it. Preparing your subfloor for vinyl flooring, hardwood, tile, laminate or carpet is crucial.
There are a few reasons a gap occurs between the joists and subfloor. Consider these three solutions to prevent or solve squeaky floors.
- Fastening: You want to fasten the subfloor securely to the joists. Sometimes, nails can be out of place and cause a gap. You can either nail or glue subfloor and joists together to secure them.
- Moisture: Water can warp wood and cause it to expand and contract. It’s best to make sure your subfloor is completely dry before installing flooring.
- Cheap subfloor: Sometimes, you get what you pay for. A cheap subfloor can require more maintenance in a short amount of time.
If you find a gap between the subfloor and joists, here are a few ways to fix the problem:
- Construction adhesive
- Wood shims
- Hold-down bracket
If you’re unsure how to fix your squeaky floor, you can always call a professional to help restore your floors.
Underlayment for Noise Dampening
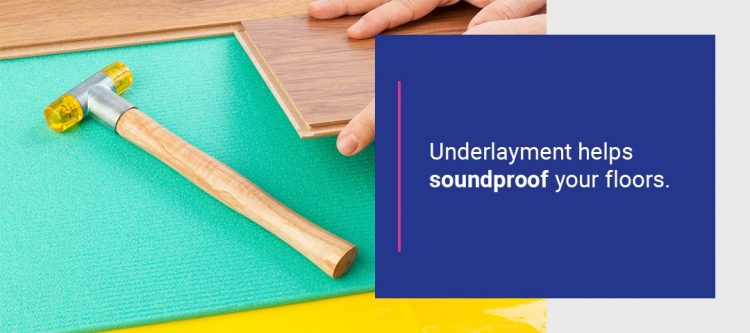
Installing underlayment underneath your flooring is an essential part of preparing your floor for new tile, wood, laminate, carpet or vinyl. Underlayment helps soundproof your floors by adding an extra layer between the subfloor and your wood flooring. Along with aiding noise reduction, underlayment helps provide durability and moisture protection to help your stunning floors last longer.
You can select from various materials and thicknesses for your underlayment. Learn which underlayment is best for your home.
- Felt: Use felt for a simple form of the underlayment. It can help with soundproofing and act as a barrier to moisture.
- Foam: This material is affordable and works well as an underlayment for your flooring. Foam provides excellent sound insulation and is a snap to install.
- Rubber: This underlayment is easy to install and is superb at sound absorption.
- Cork: If you’re looking for an eco-friendly underlayment that provides top-notch soundproofing and temperature installation, cork underlayment is an ideal option.
Some flooring materials require a specific underlayment to function correctly. If you’re unsure which to purchase, you can contact a professional to advise you on your best option.
Do I Have to Remove Baseboards for a New Floor?
When you install new flooring, you should decide whether you will place quarter-rounds, shoe molding or remove baseboards. Either way, you will need to hide the gap between the floors and wall after installation.
Quarter-rounds or shoe moldings are long pieces of wood that you add after baseboard molds. These bottom trim pieces give your floors a finished look by seamlessly connecting the baseboards and your flooring.
If you decide to take off the baseboards before installing your new flooring, it’s crucial to know how to safely remove floor moldings.
Removing your floor moldings can help make your finished product look cleaner and more professional. Remove your baseboards safely by following these steps:
- Cut any caulk or sealing that is on the baseboard.
- Use a pry bar to carefully remove the baseboard.
- Slowly work your way down the baseboard, recognizing when you need to remove nails.
- After you release the baseboard, go back and take any excess nails out of the boards.
Once you remove all the baseboards, proceed with your flooring installation process. After you complete the job, you’ll reinstall the baseboards and admire how they look with your new floors.
Hire a Professional Flooring Company
Some home renovation projects aren’t for everyone. People have various experience levels with DIY work, and professionals have a well-rounded skill set perfect for your project. It’s OK to let a professional handle the job and look forward to a finished product that will delight you.
Hiring a professional flooring company like District Floor Depot will give you peace of mind that we’ll complete the installation process and provide the best type of hardwood floors for you.
Contact District Floor Depot for Your Flooring Installation
District Floor Depot has a passion for home renovation and will provide excellent floor installation services for your home. We have firsthand experience in renewing and refreshing homes with new floors, and we want to help make that transformation happen for you.
Learn more about District Floor Depot and the services we provide or contact us for a consultation today. Our team of professionals is ready to provide quality service for your home.